Feb 05, 2018
The benefit of today’s software is it’s incredibly easy for educators to learn new ways to produce content tailored to individual students’ learning program.
Quizzes are a key tool for tutors in assessing students before and during your tutoring program. They’re a handy way to measure comprehension of your lessons, and track student performance over the course of the lesson plan.
Unlike Microsoft Forms, which require an active Microsoft Office 365 subscription with a work- or school-based account, Google Forms is a simple and easy alternative for drawing up a quiz, and what’s more, it’s totally free and available to everyone.
Tutors can create a Google Form quiz following these basic steps:
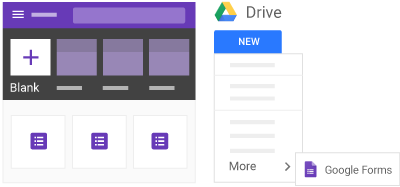
You’ll need a Google account first. Then it’s just as easy to get started with Google Forms. Build a quiz by heading to forms.google.com and choose a Blank form (or use an existing template), or selecting Forms in your Google Drive by selecting New from the top-left dropdown menu, then More, and finally Google Forms. Voila!
You can then follow the helpful advice prompts provided by Google Forms. Otherwise, go to the next step!
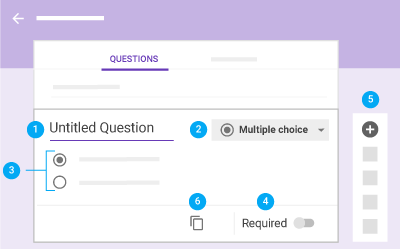
The blank forms defaults to an untitled question field. You can simply enter in your question, as well as choose the question type: multiple choice, checkboxes, short answer, and more.
This is where you can get really creative with content! The Google Forms side toolbar allows you to add a photo or video to the question, as well as photos to the answers by selecting Add Image, next to the individual answer. You also can link videos from Youtube or elsewhere on the web.
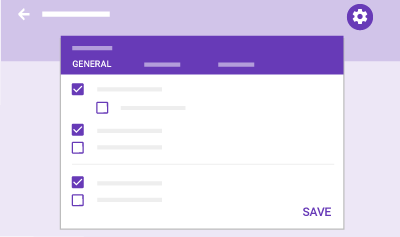
Under the Settings tab at the top-right corner, tutors can make the form a quiz. You can then set an Answer Key for each individual question, which allows you to set a point value for correct answers, and provide feedback for each correct or incorrect answer.
You can also set parameters for the quiz-taker. For example, are students allowed to edit responses after submitting their quiz? Can they see their marks automatically? Play around with the many options!
By selecting the Color Palette icon to the left of Settings, you can change the color theme, too.
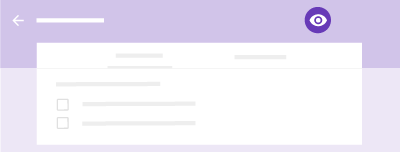
Before sending the quiz, preview the final product by selecting Preview (the eye-shaped icon) from the top-right options. To go back to editing the form, select Edit.
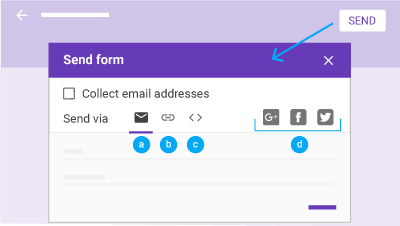
Once the quiz is ready to go, choose Send from the top-right options. There are multiple avenues available here: students can access the quiz by email, hyperlink, or embedded on your website.
The benefits of Google Forms don’t stop there: students’ responses are automatically recorded for your Google Form quiz. You can view response data overall or individually, as well as export your response data to Google Spreadsheets to use or download.

For tutors more comfortable with the non-school/work account Microsoft Office Suite, you can still build an interactive quiz with Word, Excel, or PowerPoint.
But for interactive student responses and tracking performance, Google Forms offers a free and engaging option.
banner and content images from https://gsuite.google.com/learning-center/products/forms/get-started